How to take photos for a complimentary photo assessment by Dr Kernohan
TIPS
Photographer
Find a friend or partner to take your photos. It can be difficult to capture accurate, clear photos of the area/s you wish to have assessed.
The Photos
Photos taken by your friend or partner should include a:
- Front view
- Left and Right side view.
- Left and right side at a 45-degree angle if possible.
These should be taken at a distance of approximately 1.5-2 metres. Ensure all the photos are taken at the same distance and at the same camera angle (standing on marks on the floor my help).
There is a visual guide for photo taking positions below.
Background and Lighting
- Photos should be taken against a plain wall, or uncluttered background with as much light as possible (use as many open windows and artificial lighting as you can).
- Photos taken on a smart phone or modern camera will usually be okay.
- Please do not use portrait mode.
- Make sure the entire photo is in focus.
Sending Your Photos
Be sure not to compress or edit your images. This can often cause photos to blur.
Please send original, high resolution photos only.
You can send one at a time via email (up to 10MB) if they are large to or you can upload the photos using this upload form.
How to Take Photos for Each Procedure
Breast Photos (no bra)
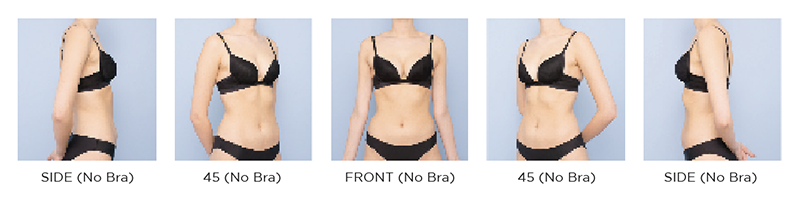
- Stand up-right with feet shoulder-width apart and your arms and hands resting by your side.
- Do not wear a bra or alter your posture or appearance.
- You should take a photo from the front, left side, right side, and ideally a photo standing at a 45-degree angle on each side at a distance of 1.5 metres.
Stomach Photos
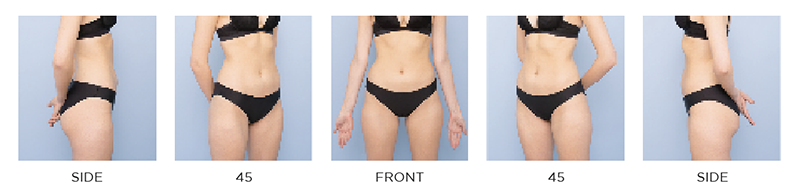
- It is best to take photos in an up-right position with your underwear or bathers pulled down to your pubic bone. This is so the surgeon can clearly view your area of concern
- Keep your posture relaxed and let your belly hang out.
- Please take photos 2 metres away of the front, left side, right side, and ideally a photo standing at a 45-degree angle on each side.
Face Photos
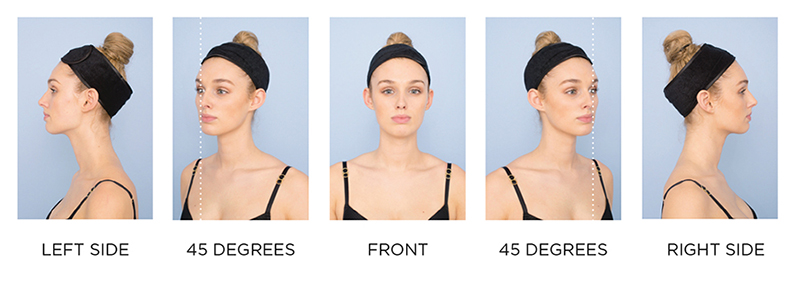
- Before you begin, ensure your hair is tied back gently with a hair tie or headband and that you are make-up free.
- You should take a photo from the front, left side, right side, and ideally a photo standing at a 45-degree angle on each side.
- The patient’s nose tip should be aligned with their pupil for the 45-degree images – refer to white dotted line.
Nose Photos
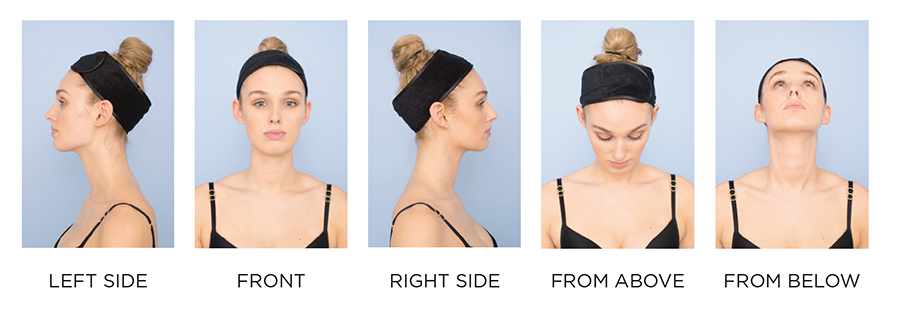
- Ensure your hair is tied back gently with a hair tie or headband and that you are make-up free.
- You should take a photo from below and above, as well as the front, left side, right side, and ideally a photo standing at a 45-degree angle on each side.
- The patient’s nose tip should be aligned with their pupil for the 45-degree images – refer to white dotted line.